Account Management
Managing your Aetheron Response account is essential for keeping your contact information current and ensuring you have the right access settings. This guide covers how to manage your user profile, email addresses, phone numbers, and connected accounts.
Accessing Your User Profile
Finding Your Profile Settings
To access your account management settings:
- Look for your profile icon in the top right corner of the dashboard
- Click on your profile area to open the dropdown menu
- Select "Manage account" or similar option
- Navigate to the User Profile section in settings
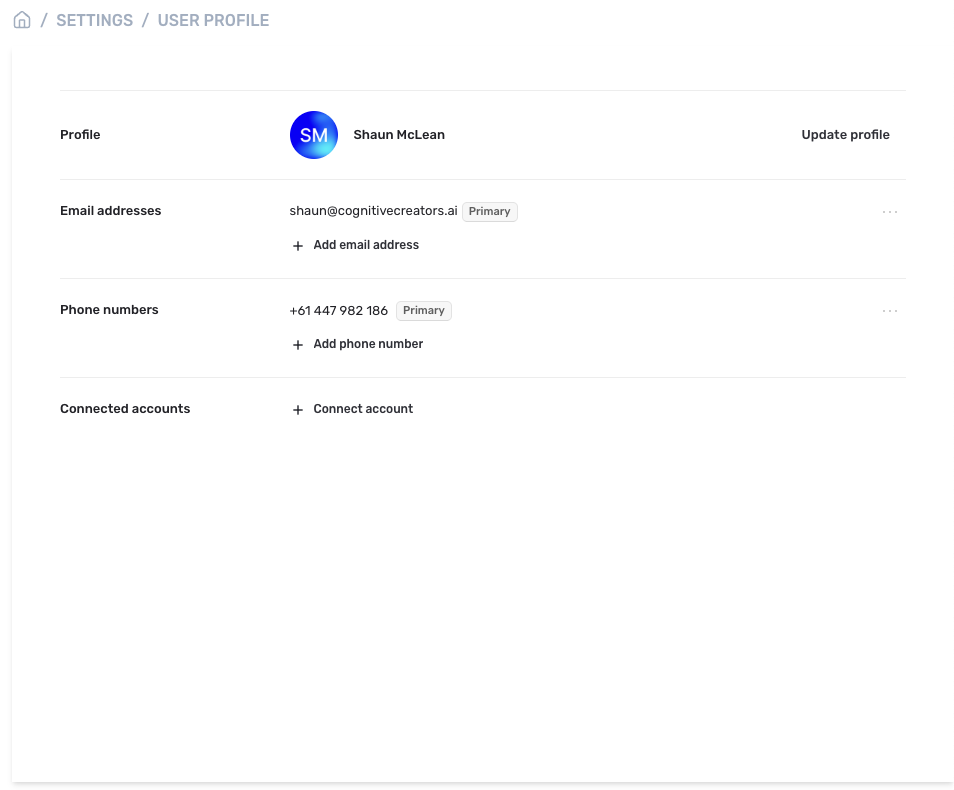
You'll see a breadcrumb navigation showing: Home / Settings / User Profile

Managing Your Profile Information
Updating Your Profile
Your profile section displays your current information and provides options to make changes:
Profile Display
- Your initials: Displayed in a circular badge (e.g., "SM" for Shaun McLean)
- Full name: Your display name on the platform
- Update profile button: Access to edit your profile information
Editing Your Profile
To update your profile information:
- Click "Update profile" button
- Modify your name and other available profile fields
- Save your changes to update your profile
- Your initials badge will update automatically if you change your name
[Screenshot would be helpful here: Profile update form with name fields]
Managing Email Addresses
Email Address Overview
The email addresses section shows:
- Primary email: Your main email address marked with "Primary" label
- Additional emails: Any extra email addresses you've added
- Add email address: Option to add new email addresses
Adding Email Addresses
To add a new email address:
Step 1: Initiate Addition
- Click "Add email address" option
- Email addition form will appear
- Enter the new email address you want to add
Step 2: Verify Email
- Submit the new email address
- Check your email for a verification message
- Click the verification link in the email
- Return to TenderCreator.ai to confirm addition
Step 3: Set Primary (Optional)
- Choose primary email: Select which email should be your main contact
- Update notifications: Ensure you receive important communications
- Confirm changes: Save your email address preferences
Managing Existing Emails
For each email address, you can:
- View status: See which email is marked as primary
- Change primary: Switch your main email address
- Remove emails: Delete email addresses you no longer use
- Resend verification: If verification emails weren't received
Managing Phone Numbers
Phone Number Overview
The phone numbers section displays:
- Primary phone: Your main phone number marked with "Primary" label
- Additional numbers: Any extra phone numbers you've added
- Add phone number: Option to add new phone numbers
Adding Phone Numbers
To add a new phone number:
Step 1: Add Number
- Click "Add phone number" option
- Phone addition form will appear
- Enter your phone number including country code (e.g., +61 447 982 186)
Step 2: Verify Number
- Submit the phone number
- Receive verification SMS on your phone
- Enter verification code in TenderCreator.ai
- Confirm addition to save the number
Step 3: Set Primary (Optional)
- Choose primary number: Select which phone should be your main contact
- Update preferences: Ensure you receive important notifications
- Save changes: Confirm your phone number settings
Managing Existing Numbers
For each phone number, you can:
- View status: See which number is marked as primary
- Change primary: Switch your main contact number
- Remove numbers: Delete phone numbers you no longer use
- Update numbers: Replace old numbers with current ones
Connected Accounts
Account Connections Overview
The connected accounts section allows you to:
- Link external accounts: Connect other services to TenderCreator.ai
- Manage integrations: Control which accounts are connected
- Enhance functionality: Enable additional platform features
Connecting New Accounts
To connect an external account:
Step 1: Initiate Connection
- Click "Connect account" option
- Choose account type from available options
- Review connection permissions before proceeding
Step 2: Authorise Connection
- Sign in to the external service if required
- Authorise TenderCreator.ai access to your account
- Confirm connection in TenderCreator.ai
- Verify successful connection in your connected accounts list
Updated 24 days ago
